

Canvas Art Hanging Guide for Every Home
Hanging canvas art correctly means placing the center of the piece at 57–60 inches from the floor, the standard adopted by institutions like MoMA and the Smithsonian to maximize viewer engagement. This canvas art hanging guide covers every decision you face: the right height, the right size relative to your furniture, the hardware that keeps your walls intact, and the layout moves that make a room feel finished rather than accidental. Whether you rent a studio apartment or own a four-bedroom house, these rules apply the same way.
What is the best height to hang canvas art?
The center of your canvas belongs at eye level, which design professionals define as 57–60 inches from the floor. That measurement refers to the center of the artwork, not the top edge or the hanging hook. Measuring from the top is the single most common reason art ends up too high.
The 57-inch standard comes directly from museum and gallery practice. When MoMA and the Smithsonian hang work, they use this line because it places the visual focal point at the average adult’s eye line. Your living room is not a gallery, but the principle holds.
Adjustments for your specific room:
- Low ceilings (below 8 feet): Drop the center to 55–57 inches to keep art from crowding the ceiling line.
- High ceilings (10 feet and above): You can raise the center to 60–62 inches without losing visual connection to the room.
- Rooms used primarily while seated (dining rooms, home offices): Lower the center to 54–56 inches so the art reads naturally from a chair.
- Stairwells: Follow the angle of the staircase and maintain consistent spacing between pieces rather than a fixed height.
When art hangs above a sofa, bed, or console, maintain a 6–12 inch gap between the top of the furniture and the bottom of the canvas. This keeps the art visually anchored to the furniture without looking like it is about to fall on it.
Pro Tip: Tape a piece of paper the same size as your canvas to the wall before you drive a single nail. Live with it for a day. You will catch height and placement problems before they become holes.
How do you size canvas art for furniture and walls?
The 60–75% rule is the most reliable sizing standard in interior design: your canvas or canvas grouping should span 60–75% of the width of the furniture beneath it. A sofa that is 84 inches wide calls for art between 50 and 63 inches wide. Anything narrower looks lost.
Undersized art creates what professional stagers call a “marooned” effect. The piece floats on the wall with no visual relationship to the room below it. This is the most common sizing mistake homeowners make, and it reduces the room’s perceived cohesion more than any color or style mismatch.
| Furniture Width | Minimum Canvas Width | Maximum Canvas Width |
|---|---|---|
| 48 inches (small console) | 29 inches | 36 inches |
| 72 inches (standard sofa) | 43 inches | 54 inches |
| 84 inches (large sofa) | 50 inches | 63 inches |
| 60 inches (queen bed) | 36 inches | 45 inches |
| 76 inches (king bed) | 46 inches | 57 inches |
For empty walls and hallways, apply a two-thirds coverage rule. The total art footprint should cover roughly two-thirds of the available wall space. A single large canvas often works better than several small ones in these situations because it reads as a deliberate design choice rather than a collection of leftovers.
Gallery walls follow the same logic. Treat the entire cluster as one piece and apply the 60–75% width rule to the grouping as a whole. A gallery wall above an 84-inch sofa should span 50–63 inches total, not each individual frame. Check out Colormelt’s guide on canvas print sizing for room-specific recommendations.
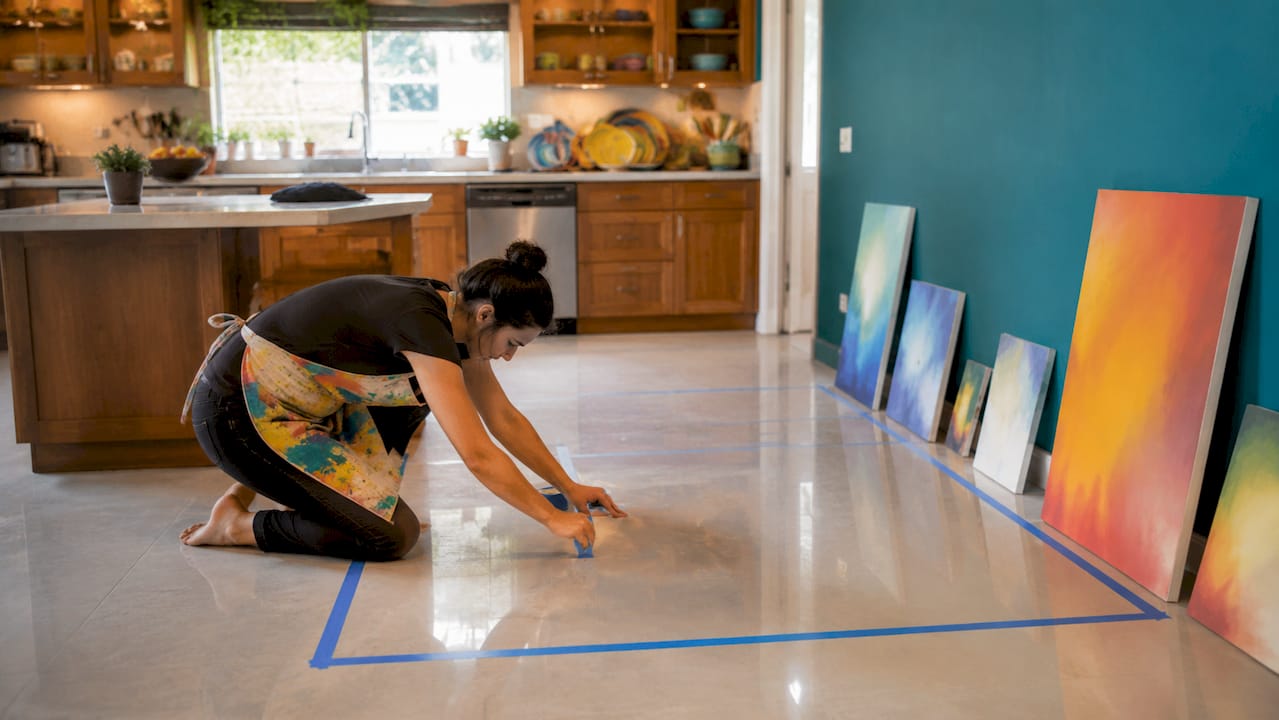
Pro Tip: Use painter’s tape on the floor to outline the furniture footprint, then tape the wall above it to simulate the canvas size. This gives you a far more accurate read than measuring alone.
What tools and hardware do you need to hang canvas art?
The right hardware is not optional. Choosing hardware matched to canvas weight and wall type is what separates a secure hang from a canvas on the floor at 2 a.m.
Tools you need before you start:
- Measuring tape (at least 25 feet)
- Pencil for marking
- Level (a 24-inch torpedo level or a free smartphone app)
- Stud finder for walls with drywall
- Drill or hammer depending on hardware type
Hardware matched to canvas weight:
- Under 5 lbs: Adhesive strips like 3M Command Strips work on smooth walls without any holes.
- 5–20 lbs: Standard picture hooks with a single nail hold reliably in drywall.
- 20–50 lbs: Use two hooks spread across the canvas width, or locate a wall stud and drive a 2-inch screw directly into it.
- Over 50 lbs: Wall anchors rated for the specific weight are required. Toggle bolts work in drywall; lag screws work in studs.
Before you hang any canvas, perform the Sag Test: press the center of the canvas gently with your palm. A quality canvas snaps back firmly. A canvas that dips and stays dipped has weak stretcher bars and will sag on the wall over time, making a flat, professional hang nearly impossible.
High-quality canvas stretching prevents this problem entirely. It keeps the surface flat and the profile clean, which matters both for appearance and for long-term durability. Your wall decor checklist can help you avoid common hardware mistakes before they damage your walls.
How to hang canvas art step by step
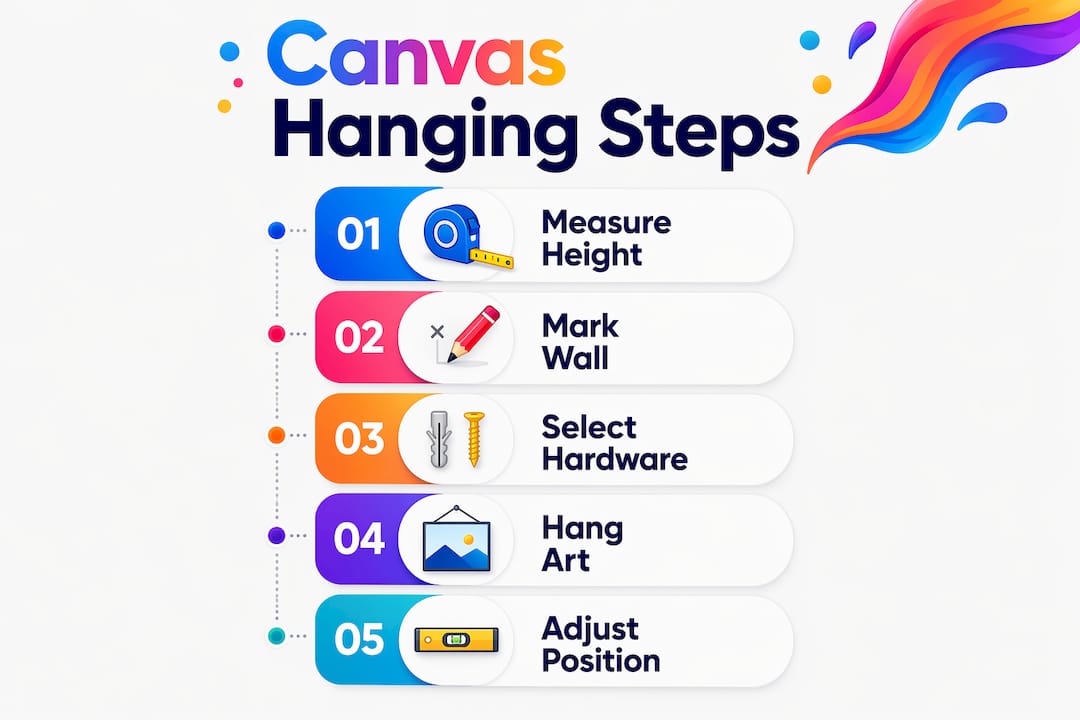
A clean hang takes about 15 minutes when you follow the steps in order. Skipping steps is where mistakes happen.
- Find your center point. Measure 57–60 inches up from the floor and mark it lightly with a pencil. This is where the center of the canvas will sit, not the top edge.
- Measure the canvas. Find the distance from the top of the canvas to the hanging hardware on the back (wire, D-ring, or sawtooth bracket). Subtract this number from your center-height measurement to find where your nail or screw goes.
- Mark the nail point. Make a small pencil mark at the calculated height. Double-check with your measuring tape.
- Check for studs. Run your stud finder across the mark. If a stud falls within 2 inches of your mark, use it. If not, use an appropriate wall anchor.
- Install the hardware. Drive your nail or screw at the marked point. Use your level to confirm the hardware is straight if you are using two hooks.
- Hang the canvas. Lift the canvas onto the hook or wire. Step back and check alignment from across the room, not from directly in front.
- Level and adjust. Place your level on top of the canvas frame. Adjust left or right until the bubble centers. For wire-hung pieces, slide the wire along the hook to fine-tune.
Pro Tip: Put a small piece of painter’s tape behind the bottom corners of the canvas frame before hanging. It grips the wall slightly and stops the canvas from tilting over time without leaving any marks.
What are the most common mistakes when hanging canvas art?
Most hanging problems come down to three errors: wrong height, wrong size, and wrong hardware. All three are avoidable.
Height errors are the most visible. Art hung too high disconnects from the room and forces viewers to look up uncomfortably. Art hung too low crowds the furniture beneath it. The 57–60 inch center rule eliminates both problems. If you are hanging above a fireplace mantel, keep the bottom of the canvas at least 6 inches above the mantel surface to avoid heat damage and visual clutter.
Spacing errors create tension between art and furniture. Leaving 6–10 inches of breathing space between the furniture top and the canvas bottom maintains design harmony. Less than 6 inches feels cramped. More than 12 inches breaks the visual connection between the art and the furniture it is meant to anchor.
Hardware failures are the most damaging. Using a single small nail for a 30-pound canvas is a structural problem, not just an aesthetic one. Match your hardware to the weight every time. When in doubt, go one level heavier than you think you need.
A few additional mistakes worth avoiding:
- Hanging multiple pieces at inconsistent heights across a wall
- Choosing frames that fight the wall color instead of complementing it
- Ignoring the canvas’s impact on room style when selecting subject matter and color palette
- Skipping the level entirely and trusting your eye
Key takeaways
Hanging canvas art well requires three things: correct height at 57–60 inches center, proper sizing at 60–75% of furniture width, and hardware matched to canvas weight and wall type.
| Point | Details |
|---|---|
| Center height standard | Place the canvas center at 57–60 inches from the floor, not the top edge. |
| Furniture spacing rule | Keep 6–12 inches between the top of furniture and the bottom of the canvas. |
| Sizing by the 60–75% rule | Canvas width should span 60–75% of the furniture or wall section beneath it. |
| Hardware by weight | Match adhesive strips, hooks, or anchors to the canvas weight to prevent wall damage. |
| Gallery wall as one unit | Treat a grouped arrangement as a single piece and apply the same sizing rules. |
What i have learned after hanging hundreds of canvases
By Shlomo
The rule most people ignore is the one that matters most: size. Every client I have worked with who was unhappy with their art placement had chosen a canvas that was too small. They bought something they loved in a store, brought it home, and hung it on a wall that swallowed it whole. The 60–75% rule feels aggressive until you see it in action. Then you cannot unsee it.
The second thing I have noticed is that people treat the 57-inch rule as a ceiling rather than a starting point. It is a baseline. A room with 12-foot ceilings and a dramatic abstract piece may call for the center at 62 inches. A cozy reading nook might feel better at 54. The rule gives you a foundation. Your room gives you the final answer.
My honest advice on gallery walls: plan the entire arrangement on the floor before touching the wall. Photograph it from above. Then transfer it to the wall using paper templates and painter’s tape. This process takes an extra 30 minutes and saves you from a wall full of unnecessary holes.
One more thing. A single large canvas almost always outperforms a collection of small ones in terms of visual impact. If you are debating between one 40x60 piece and four 12x16 pieces, go large. The room will thank you. Colormelt’s multi-panel canvas options are worth considering when you want scale without a single massive frame.
— Shlomo
Find the right canvas art at Colormelt
Once you know your measurements and hardware plan, the next step is finding art that actually fits the space you have designed.

Colormelt carries a curated collection of wall art built for exactly this kind of intentional placement. Each product page includes sizing details so you can match dimensions to your furniture width before you buy. The collection spans abstract weave designs, bold cyclone patterns, and vibrant floral prints, all produced with fade-resistant inks on quality canvas. Whether you need a single statement piece above a sofa or a set for a gallery wall, Colormelt’s room-by-room styling guide helps you visualize the result before anything ships.
FAQ
What height should canvas art be hung at?
The center of a canvas should sit 57–60 inches from the floor. This is the standard used by museums like MoMA and recommended by interior design professionals for optimal viewer engagement.
How far above a sofa should i hang canvas art?
Maintain a 6–12 inch gap between the top of the sofa and the bottom of the canvas. This keeps the art visually connected to the furniture without feeling cramped.
What size canvas do i need for my sofa or bed?
The canvas or canvas grouping should span 60–75% of the furniture’s width. For an 84-inch sofa, that means art between 50 and 63 inches wide.
What hanging hardware should i use for heavy canvas art?
Use wall anchors or toggle bolts for canvases over 20 pounds. For pieces over 50 pounds, locate a wall stud and use lag screws rated for the specific weight.
How do i hang a gallery wall evenly?
Treat the entire grouping as one piece and apply the 60–75% width rule to the cluster as a whole. Arrange pieces on the floor first, photograph the layout, then transfer it to the wall using paper templates and painter’s tape.